{{g.topic}}{{g.level}}{{g.minutes}}
{{g.title}}
{{g.lead}}
{{g.progress}}{{g.allLabel}}
Jump to section
{{sec.h}}
Tip:
Short written guides for the things people make most. Each one matches what you’ll see in the studio.
{{g.lead}}
Tip:
Get your design out of ShapeNook and into your slicer: an STL on any plan, or a 3MF that keeps every color with ShapeNook Plus.
With ShapeNook Plus, turn on Overhangs in the top bar to see steep undersides in red, where a print may need supports. If a part is bigger than your printer’s bed, Split to fit, with pins in its panel cuts it into pieces that pin back together. On Free, skip this step.
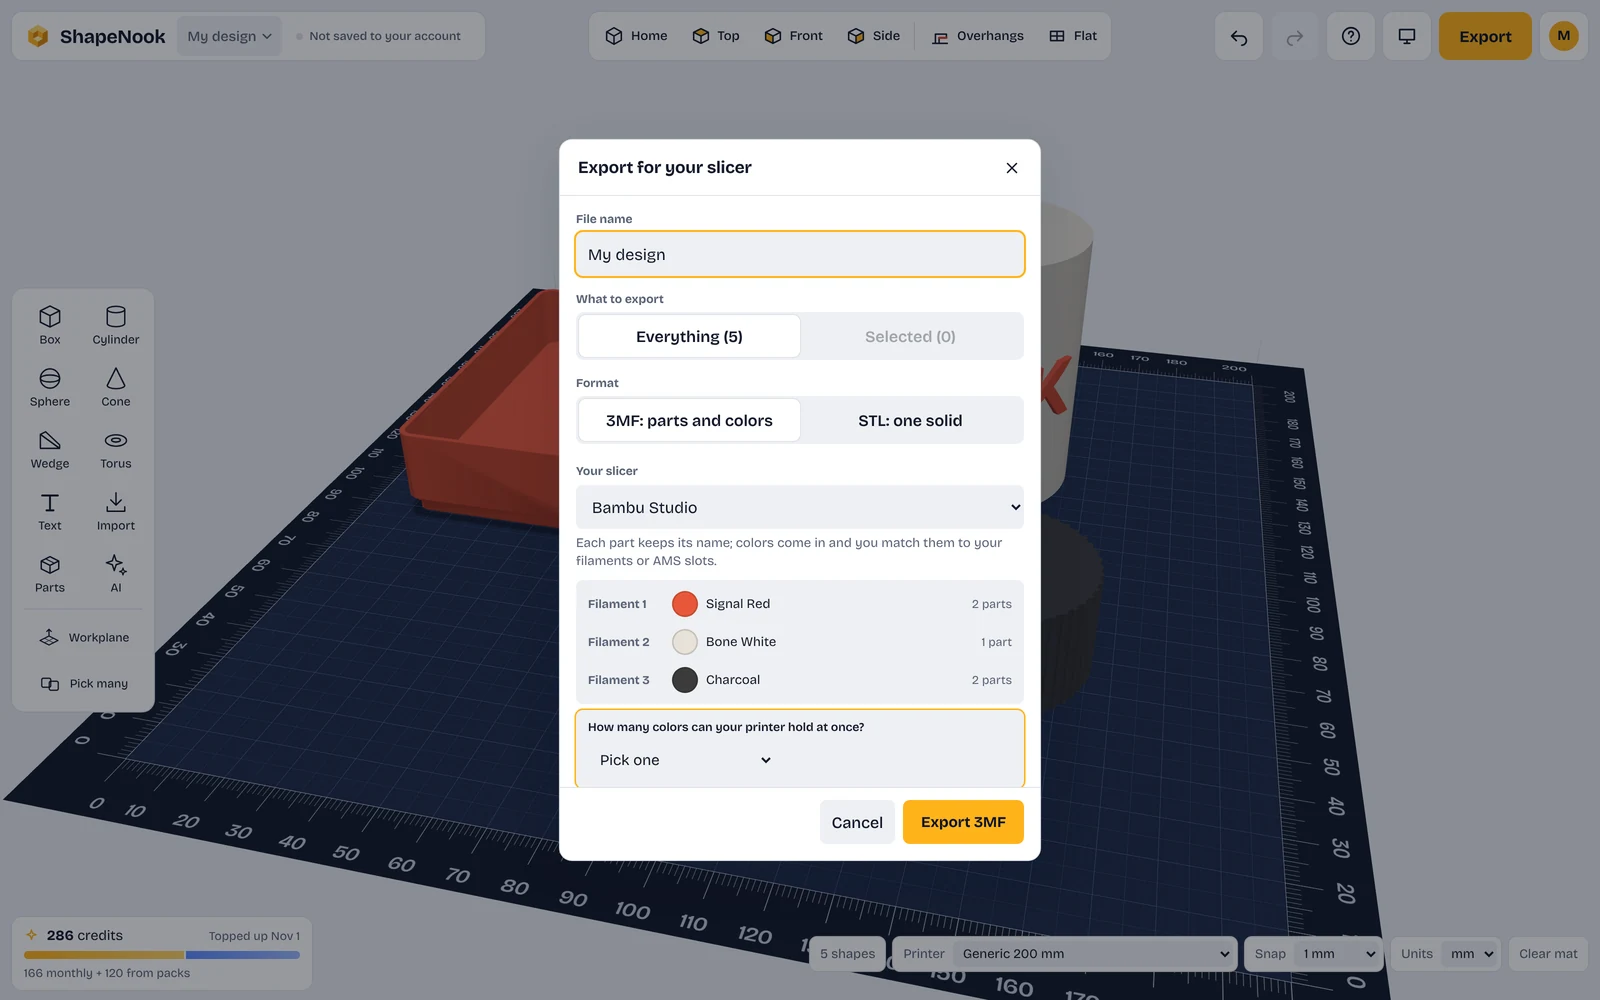
Click or tap Export at the top right and give your file a name. Choose whether to export everything or only what’s selected.
STL is one solid piece, free and unlimited, and it’s all you need for a one-color print. 3MF keeps each part’s name and color, and the paint on a painted model, so a multi-color print arrives ready to go. 3MF export comes with ShapeNook Plus.
Choose Bambu Studio, OrcaSlicer, PrusaSlicer or Cura so the file is set up the way that slicer expects. You’ll see the filament colors in your design, and you can say how many colors your printer holds at once.
Open the file in your slicer, match each color to a filament slot (the AMS on Bambu printers), slice and print. Bambu Studio, OrcaSlicer and PrusaSlicer show a painted model with its paint; Cura prints one filament per part, so for Cura cut a painted model into color parts first. See Paint a model in colors.
Tip: Curved parts look smoother with a finer smoothness setting in the export window. It makes the file bigger, so save it for small, round parts.