Design it so it prints without supports.
Supports waste filament, leave scars and fail in the middle of the night. Most of them can be designed away before you ever open your slicer, with a few simple rules about angles, bridges and which side faces down.
Five rules that remove most supports
- Keep slopes under about 45° from upright. Each layer can stick out a little past the one below it. Past about 45°, there’s nothing underneath to hold it, and it droops. Many printers manage more; the free Overhang test tells you yours.
- Chamfer the undersides, round the tops. A 45° chamfer under a ledge prints clean. A rounded edge underneath starts flat and droops. Save rounded edges for top surfaces.
- Bridge short gaps instead of overhanging them. A flat span held up at both ends prints across open air. How far depends on your printer; the free Bridging test checks 10 to 60 mm.
- Make sideways holes teardrop-shaped. A round hole lying on its side has a flat roof. A pointed top at 45° prints without supports and a screw still fits.
- Choose the side that faces down. Put the biggest flat face on the bed. If no side works, cut the part in two along a flat face and glue or pin it together.
See the problem before the printer does
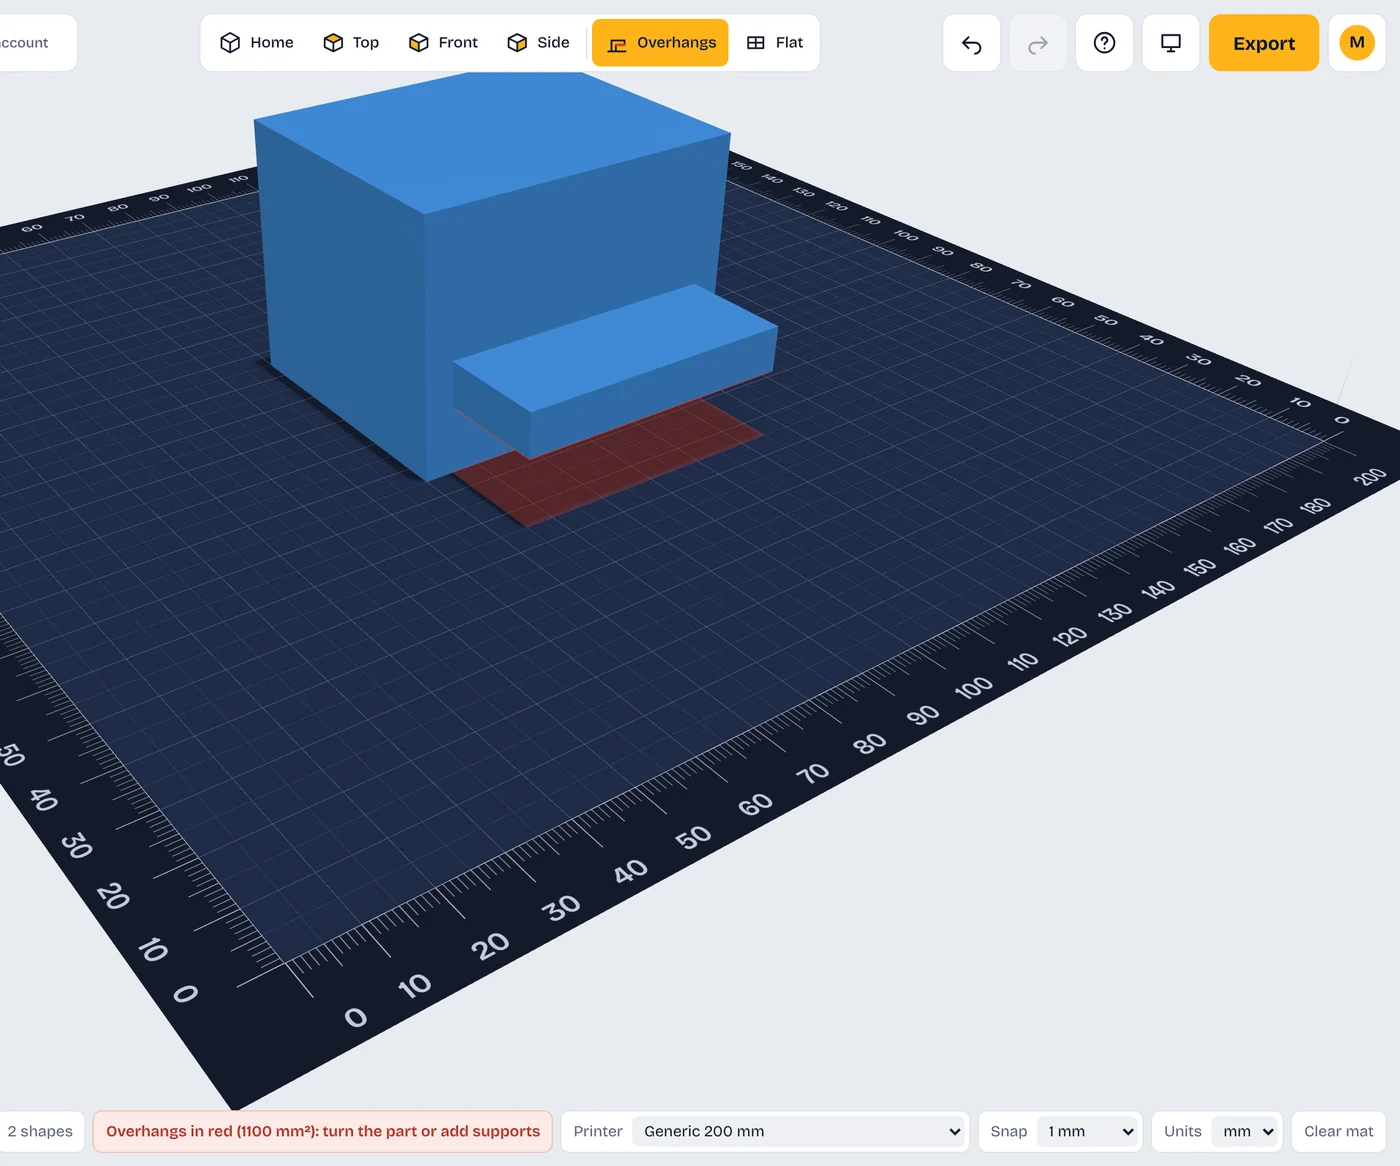
Overhang check (Plus). Turn on Overhangs in the top bar and anything that would print in midair turns red, with its shadow on the mat showing where support would go.
Tuned to your printer (free). Print the Overhang test from Tools: six fins leaning from 45° to 70°. Tap the last one that came out clean, and the check then shows only what your printer can’t manage.
Cut it flat (Plus). When no side can face down, Cut shapes apart with a straight cut, or use Split to fit with pins that join the pieces back together.

Where supports usually sneak in
| The trouble spot | Why it needs support | The design fix |
|---|---|---|
| Hooks and ledges | Flat underside sticks straight out | Add a 45° chamfer or brace underneath |
| Screw holes on the side | Round top is a flat roof | Teardrop hole with a 45° point |
| Box lids with a lip | The lip overhangs when printed upright | Print the lid upside down, lip up |
| Arches and windows | Wide flat top over open air | Pointed or stepped top, or keep the span within your bridging test |
| Text on a wall | Letters stick out sideways | Cut the text in, or turn the part so the text faces up |
| Figures with outstretched arms | Arms hang in midair | Lower the arms toward 45°, or split the arm off and pin it |
Questions about supports
What is the 45 degree rule?
Most printers can print a surface leaning up to about 45° from upright without support, because each layer still rests mostly on the one below. Past that, it starts to droop. Your printer may do better: the free Overhang test checks 45° to 70°.
Are supports ever the right answer?
Sometimes, for figures and organic shapes. For parts you design yourself, a chamfer, a different orientation or a split usually prints cleaner and faster.
How long can a bridge be?
It depends on your printer, filament and cooling. Many printers bridge a few centimeters cleanly. The free Bridging test prints spans from 10 to 60 mm so you know your number.
Does ShapeNook add supports?
No, your slicer does. ShapeNook helps you design parts that don’t need them, and shows where they would go with the Overhang check.